Turn a MagSafe charger into an iPhone webcam mount
Background
I stare at a screen all day. To make that a more pleasant experience, I got one of those fancy new Apple Studio Displays. However, its webcam is no good. Even after the vaunted firmware update, the Studio Display’s image quality isn’t any better than other cheapo webcams.
Recently I found out that I can use my iPhone as a webcam with Apple’s Continuity Camera feature. The iPhone takes pretty solid photographs and even has a cool lidar sensor to help detect depth and create sorta-realistic bokeh. I first tried out Continuity Camera by sketchily balancing my iPhone on top of my display, and it looked great as a webcam. I’m sold!
But how was I going to mount the phone in a way that wasn’t a total pain? I use my phone regularly throughout the day, so I need to be able to mount and dismount it very easily. Also, I attend a lot of Zoom meetings, so Continuity Camera is going to drain my phone’s battery big time. It would be nice to have a way to keep the phone charged up even with this power-hungry camera activity, but I didn’t want to be constantly plugging and unplugging the phone. Finally, I didn’t want to modify the Studio Display in any way that would render the display’s microphones or built-in webcam unusable.
As I looked around the web, it seemed like there were a few half-baked concepts for Studio Display mounts, but I wanted to get going right away. Then I started thinking about an extra MagSafe charger I had lying around.
The Solution
The MagSafe charger could be perfect! It could easily mount and dismount the phone while charging it at the same time. The Studio Display even has some handy USB-C ports to plug in MagSafe charger. But how to attach the MagSafe charger to the back of the Studio Display?
I wanted a solution that would keep the camera as close as possible to the top of the Studio Display so that the view from the camera didn’t look “down” on me too much. However, I didn’t want the camera so close to the bezel of the display that the case of the display would be in the camera’s field of view.
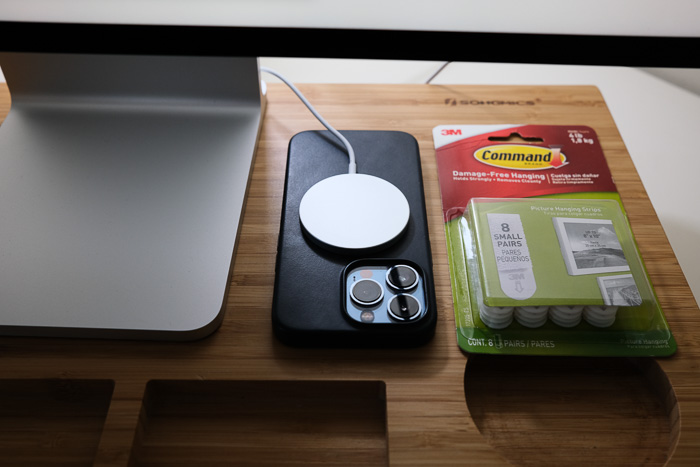
I came up with the idea to use 3M Command Stip picture hanging “velcro.” These have adhesive on one side and the other side is a strange and cool velcro-like material made of tiny little nubs. The Command Strips’ adhesive comes off clean if I ever wanted to remove the mount, and the velcro connection would allow me to reposition the mount, if necessary.
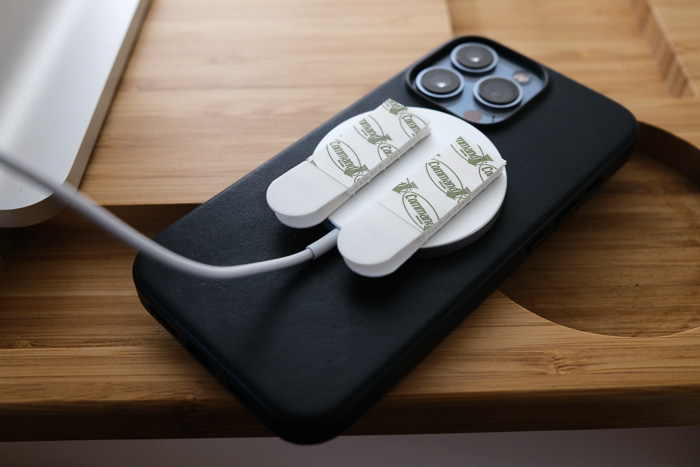
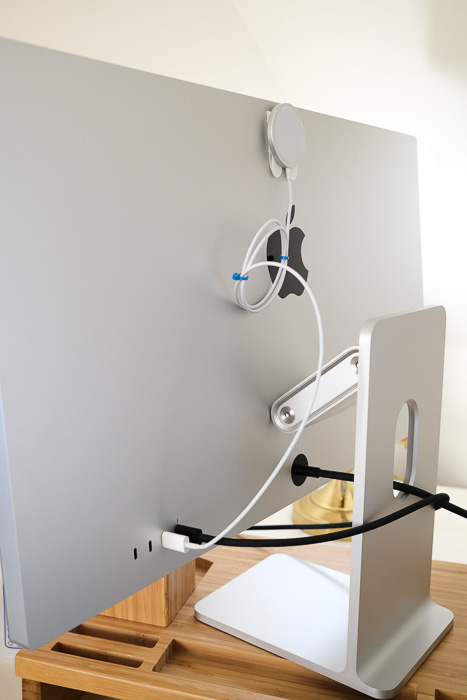
To build the mount, first make sure to wipe the back of the MagSafe charger and the Studio display clean with rubbing alcohol. Let all the alcohol evaporate away, and then stick the Command Strips to the MagSafe charger. I recommend using two strips and keeping them away from the middle of the MagSafe charger (you’ll see why soon).
Next, on the MagSafe charger, ensure that you have both sides of the Command Strips stuck together (both halves of the “velcro” connected). Now, peel the backing off of the side of the Command Strips that will stick to the Studio Display, and carefully position the charger so that (1) the bottom of the iPhone’s 3-camera “bulge” is roughly aligned with the top of the Studio Display, and (2) so that the Command Strips straddle the little tiny microphone hole (pink arrow) on the back of the Studio Display.
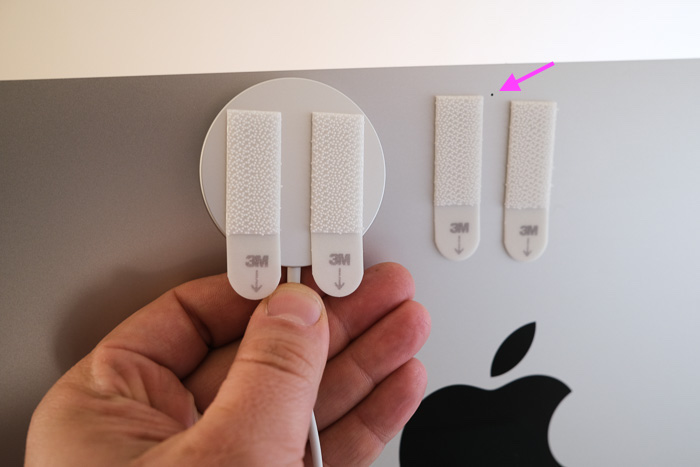
Once you have stuck everything on and held the Command Strips down for the recommended ~30 seconds, you can detach the velcro and make sure you avoided the microphone.
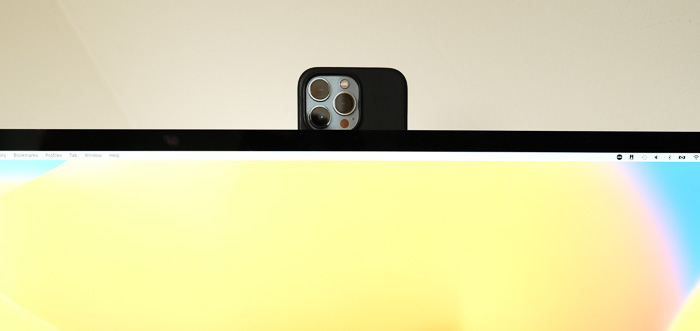
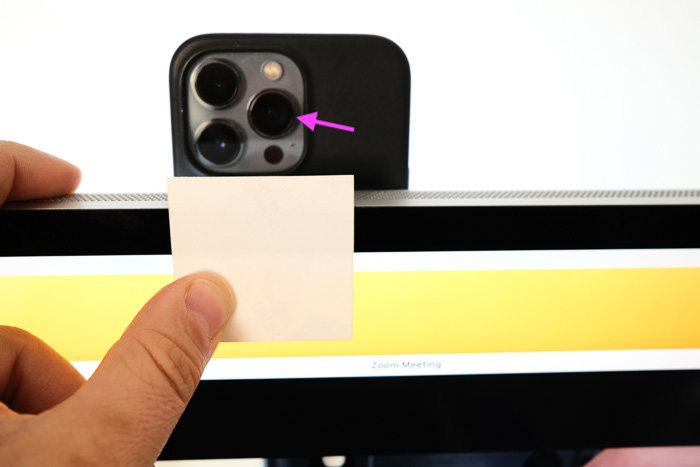
I was curious to see how close the bezel of the Studio Display was to the camera’s field of view. So, first, I figured out that the camera that the iPhone uses for Continuity Camera is the isolated single lens on the right (shown with a pink arrow). To check where the edge of the camera’s field of view was, I slowly lifted up a piece of paper until I could just barely see it in video feed. There’s about 1 centimeter of clearance, so the field of view is well clear of the monitor’s bezel!
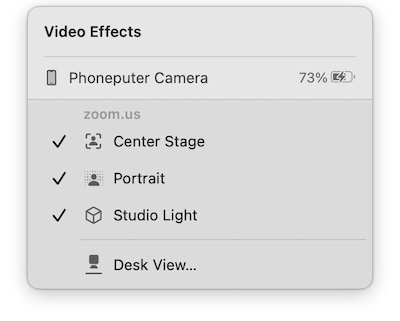
While writing this article, I learned that there is another cool Continuity Camera feature called Desk View that will use the iPhone’s ultra-wide lens to look down at your desk, keyboard, and lap. This is useful if you want to sketch something or show off some small items (or get caught not wearing pants on a conference call). I didn’t check to see if the Studio Display’s case interferes with this setting
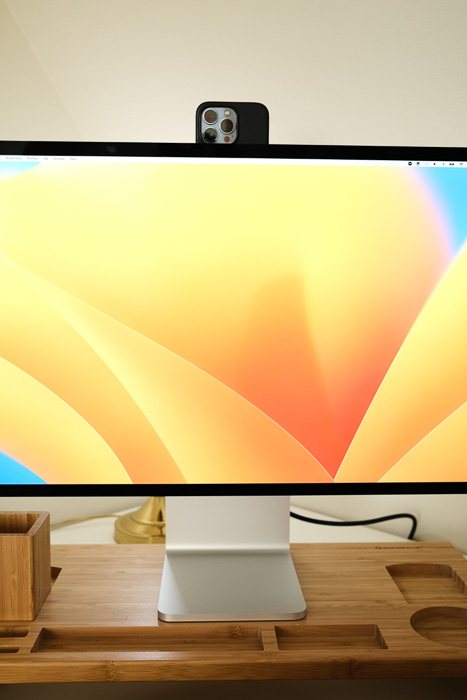
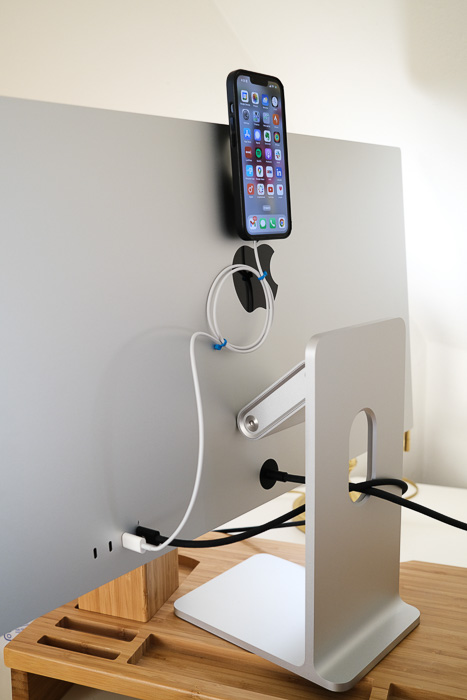
Anyhow, now everything should be good-to-go. You can plug in the MagSafe charger to the Studio Display’s USB-C port, manage the extra cable with some zip ties (you can see mine are blue), and mount your iPhone!
The Results
Using the iPhone 13 as a webcam works great, and it’s awesome to have a magnetic mount that also keeps my phone charged up! The picture quality is so much better than the Studio Display. Adding in Portrait Mode, Center Stage, and Studio Lighting in Control Center really add to the quality feel. I can quickly mount and dismount my camera, Zoom remembers my most recent camera preference, and because everything is inside the Apple ecosystem, it “just works.” Huzzah!
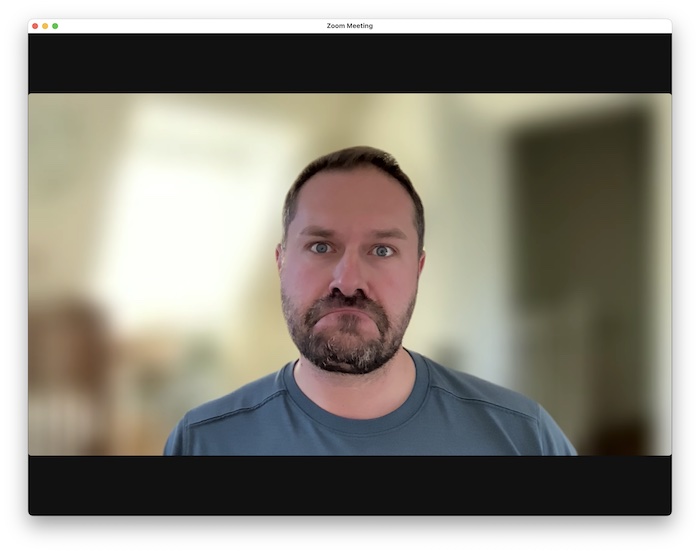
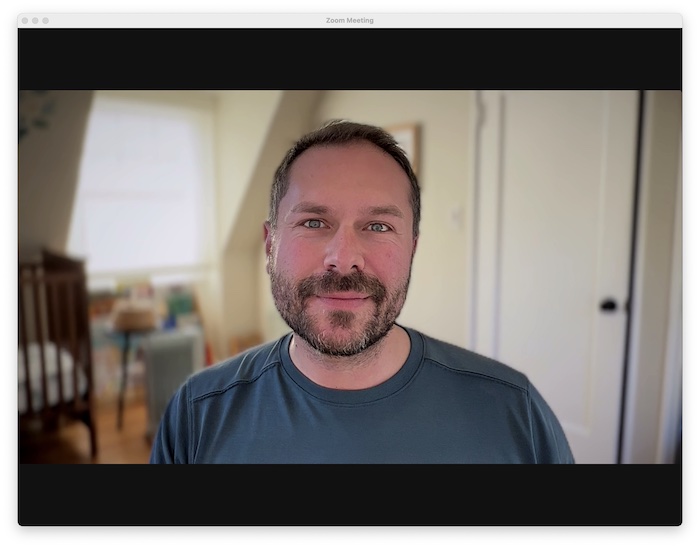
Check out these before and after pictures. The before picture uses the Studio Display’s built-in webcam and Zoom’s junky “blur background.” Compare that to the happy after picture using the iPhone’s lidar to create more realistic bokeh. Also, obviously, the iPhone picture is much sharper with better dynamic range!